
Initial setup
- 01
1. Install the app
Download PosPrinterDriver from Google Play and open it on the Android device that will connect to the printer.
- 02
2. Grant the requested permissions
Allow notifications, Bluetooth or USB when Android asks. The permissions shown depend on your Android version and connection type.
- 03
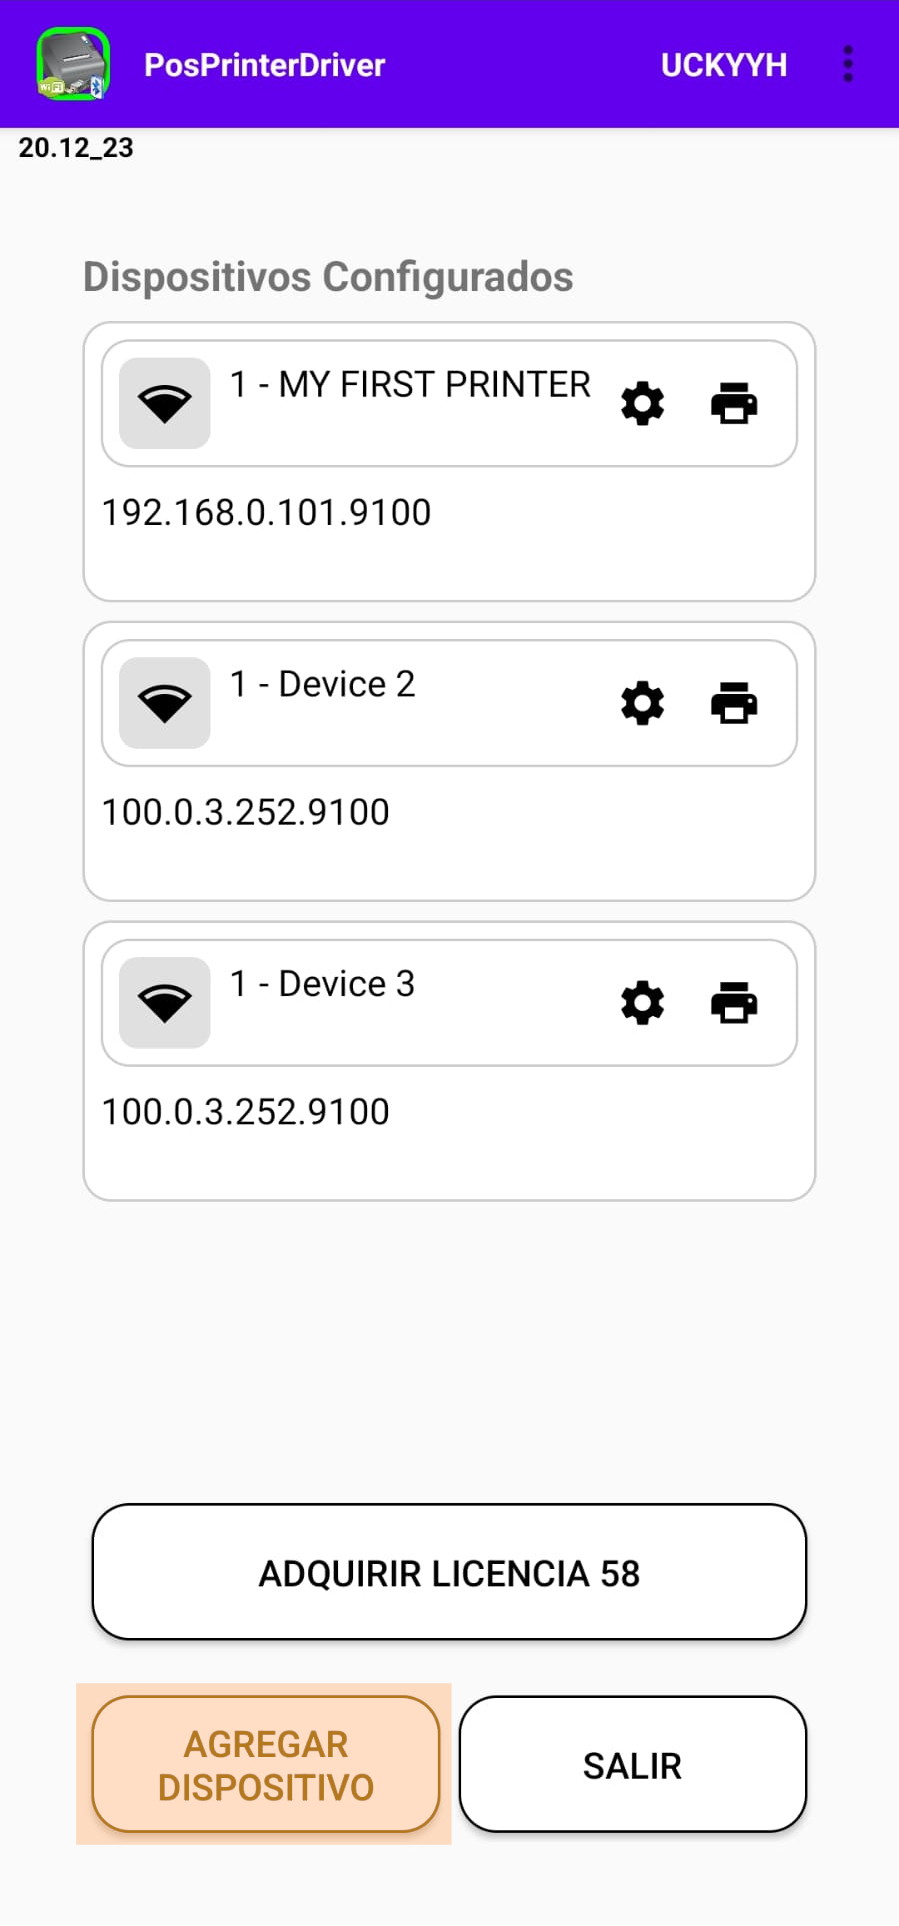
3. Add a printer
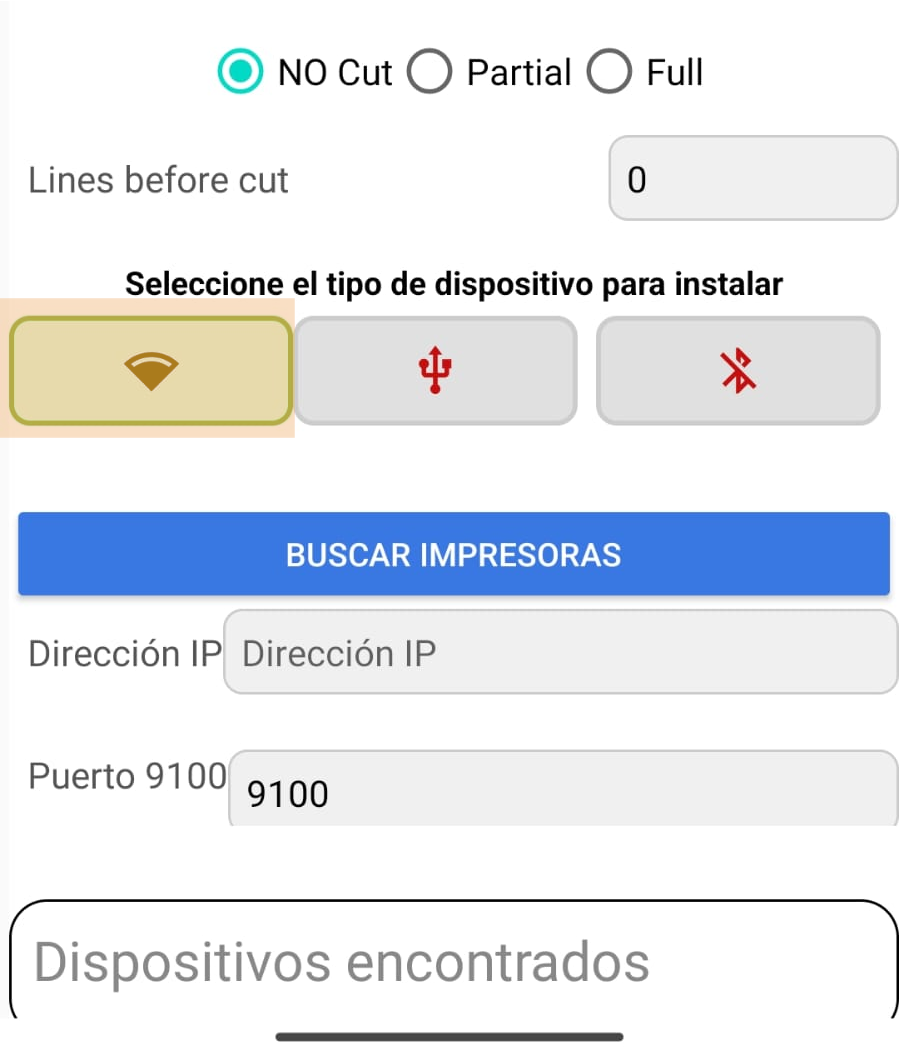
Select Add, give it a clear name and choose Network, USB or Bluetooth.
- 04
4. Complete the connection
Enter the IP and port for Network, accept the device for USB, or select the previously paired printer for Bluetooth.
- 05
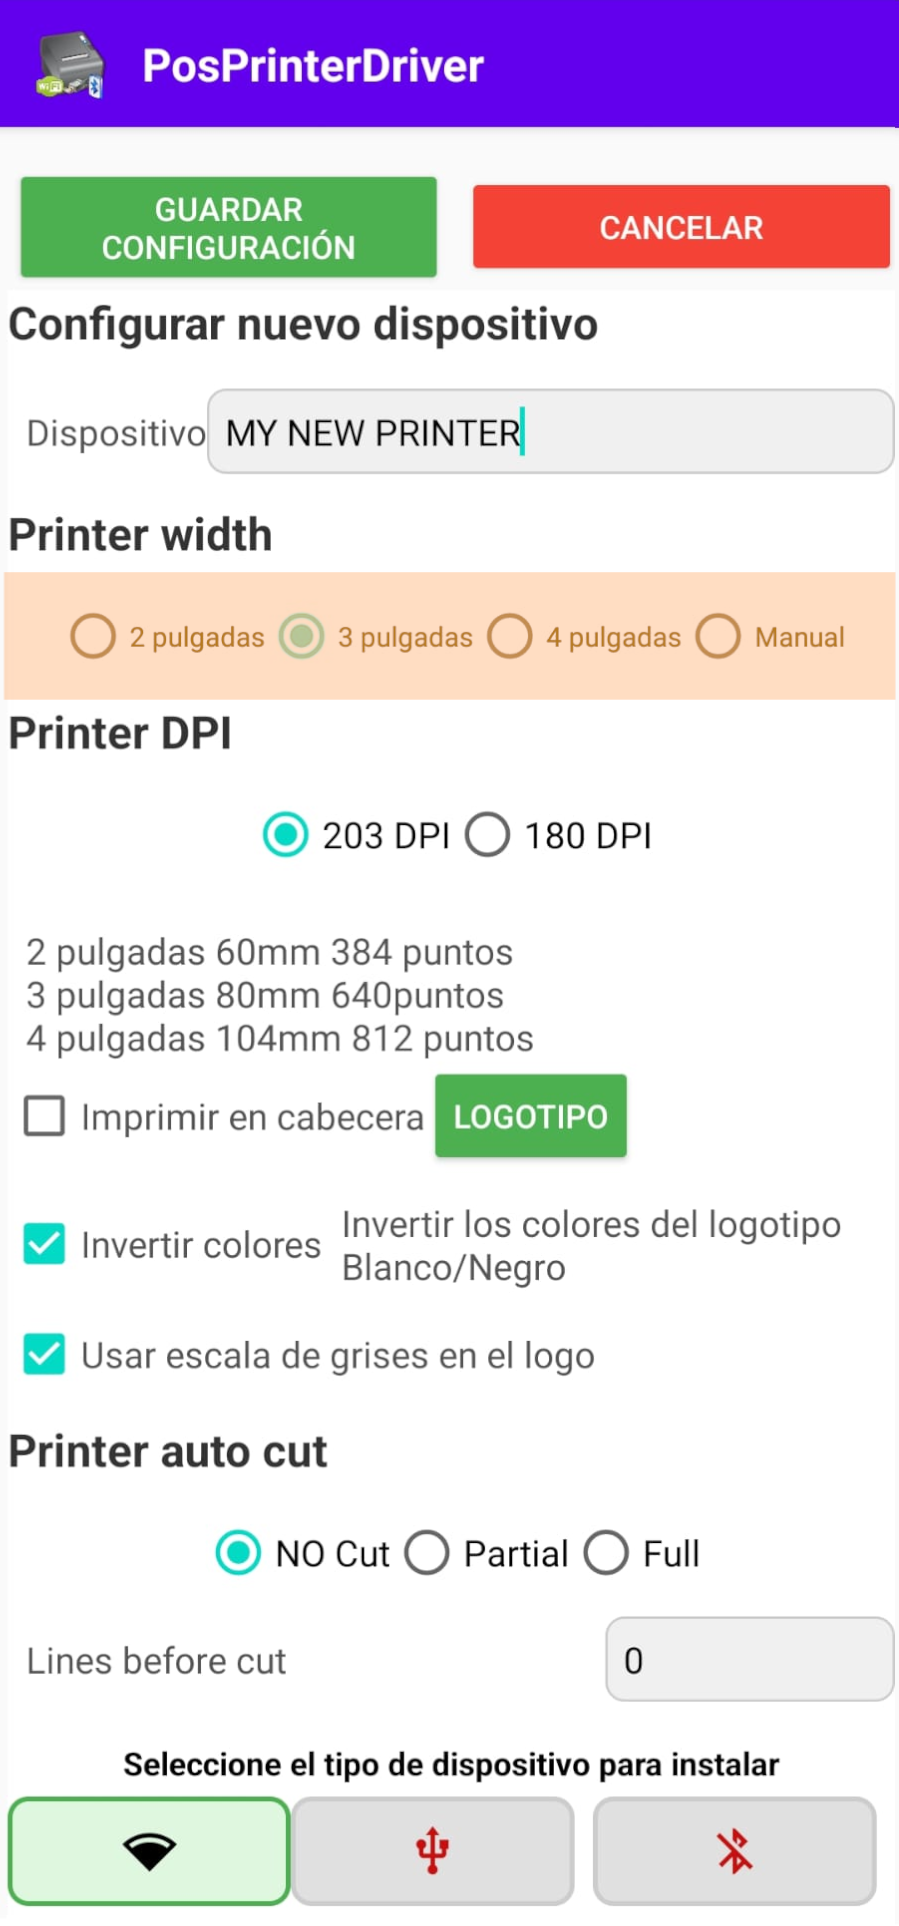
5. Set paper and resolution
Choose 2, 3 or 4 inches, or a custom width, and 180/203 DPI to match your printer.
- 06
6. Print a test
Run the font test. Then test the code page, logo or QR if your workflow uses them.
- 07
7. Enable the required service
Enable the print service for background jobs and the web service if you will use the remote queue.
- 08
8. Integrate your source
Choose the Android, web or server guide and start with the minimal example.
Reference screens
Screenshots may differ from your installed version, but show the general setup sequence.
Continue with your job source
Android
Intent, ACTION_SEND and shared content.
Open guideWeb
Explicit links for text or files.
Open guideWeb management
Account, devices and a guided print test.
Open guideServer
Linkcode registration and remote queue.
Open guide