
Open web management
I already have an account
Sign in to see your devices, link another one and open its history.
Sign inI want to create an account
You need the Link from an active device that is not already linked to another account.
Create accountI want to test from this website
Enter your own Link and send the sample ticket. You can check the response without printing again.
Open the testFrom the app to your account
- 01
Prepare the main printer
Configure printer number 1 on Android and check that it prints from the app. Keep the print service and web service enabled, with Internet access.
- 02
Get the Link code
In PosPrinterDriver, open Web management or tap the Link at the top. Register the device if no code is shown yet. Tap Copy link; Open management also copies the code and opens your browser.
- 03
Create your account
On the sign-in page, select Create an account. The first field is Device Link code: paste the code from your app and enter your details and password. The management screenshots show the Spanish interface.
- 04
Check the linked device
After registration, My devices opens and that Android device is linked to your account. A nonexistent Link, a disabled device or an already linked device cannot be used to complete registration.
Already registered? Add another device
- 01
Open My devices
Sign in with your existing account. You do not need another account to add an Android device.
- 02
Select Link device
Paste the Link into Device Link code and select Link. The device must be available and must not belong to another account.
- 03
Open its details
In Your devices, select View device. Search by name or Link and sort the table to find it.
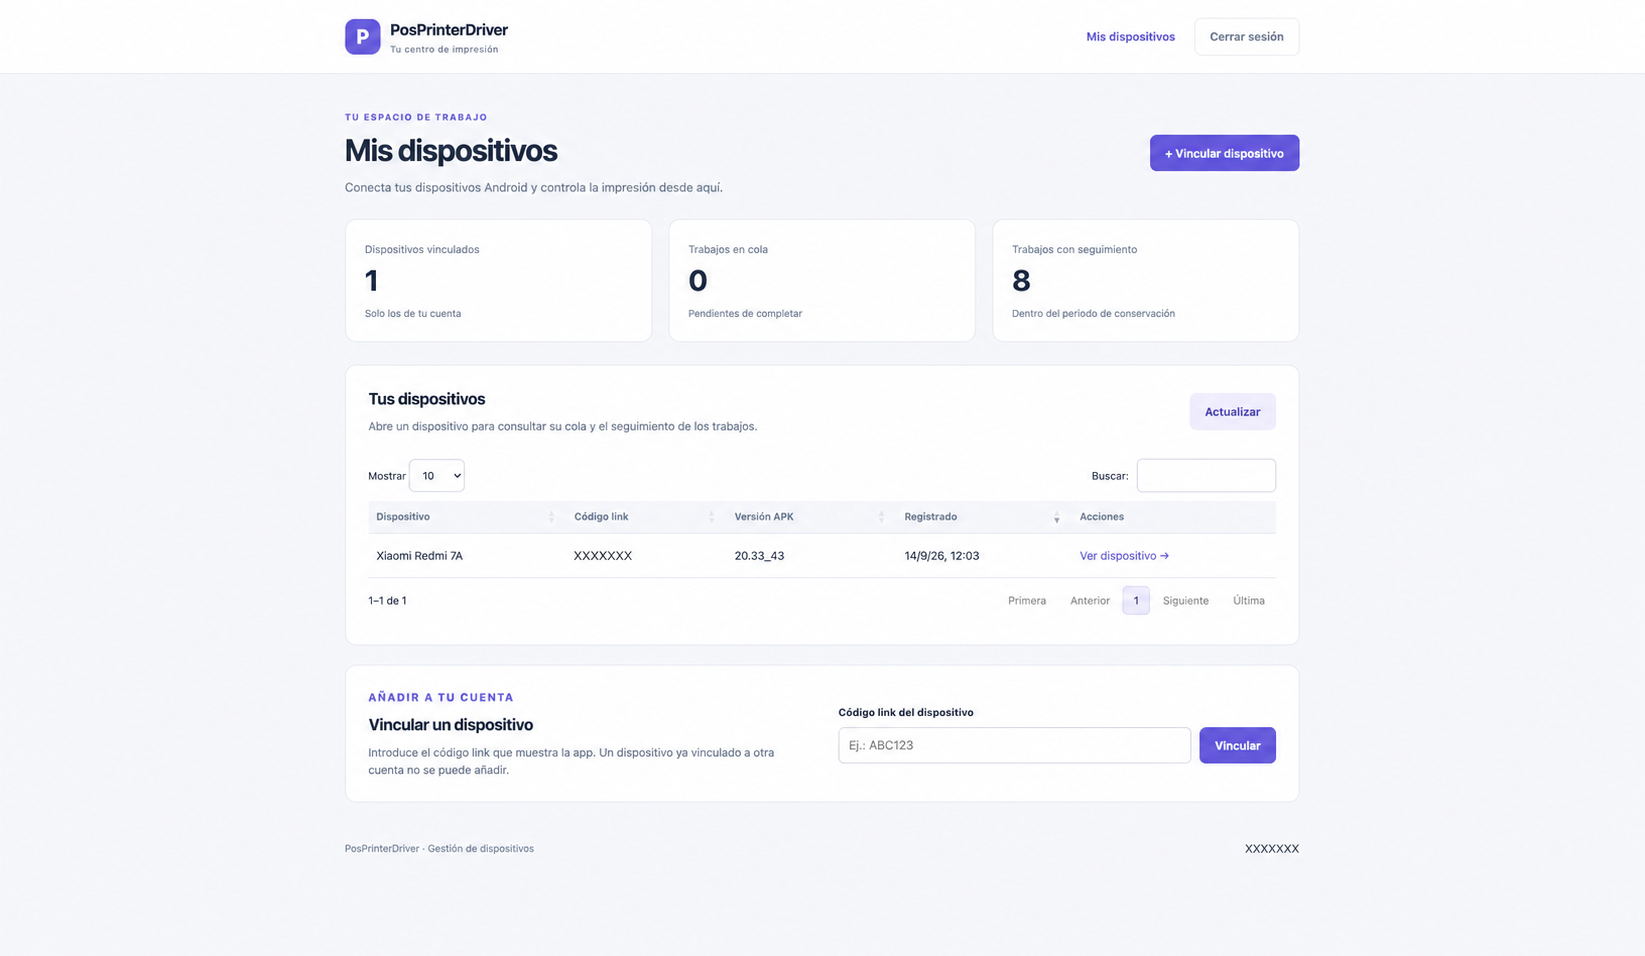
What the dashboard looks like
Screenshot of the management dashboard with private details hidden. The interface shown is in Spanish. Select the image to enlarge it.
Send and check a test ticket
- 01
Turn on the printer and open the app
Check the paper, connection and permissions. Keep the web service enabled on Android; remote jobs use printer number 1.
- 02
Select Print test ticket
On the device details page, select the button once. The job appears in the queue or history as it progresses.
- 03
Follow the result
Tables refresh every ten seconds. Use Refresh, Search or the Status filter to find the job. Checking or refreshing does not print it again.
- 04
Check the paper
Sent to printer means the app finished handing over the data without detecting an error. Also check that the physical ticket came out.
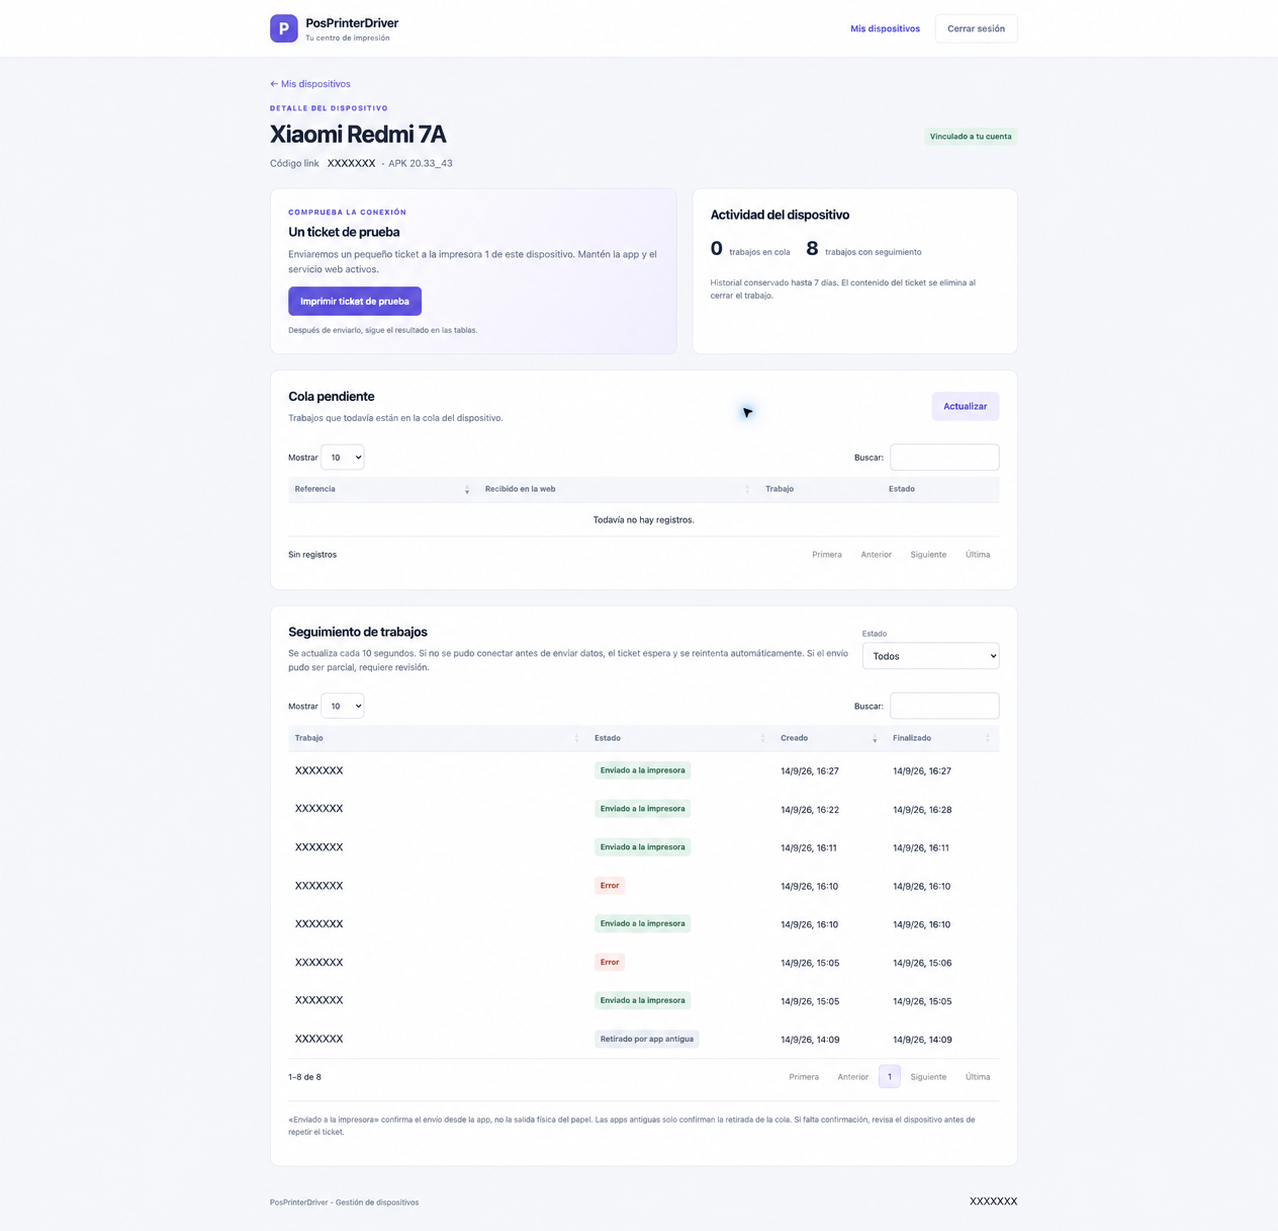
The test and its status
Screenshot of a device details page and its history in the Spanish interface; private identifiers are hidden.
Understanding each status
| Management status | What it means | What to do |
|---|---|---|
| Queued | The server has stored the ticket and is waiting for the terminal. | Keep Android connected and the web service enabled. |
| Dispatched to app / Received by app | The job is reserved for the terminal, or the terminal has confirmed receipt. | Wait for the delivery result. |
| Sending | The app is trying to hand over the data to the printer. | Do not select Print again. |
| Waiting for printer | The connection failed before any attempt to write the ticket. | Restore the connection; Android 20.33 or later retries automatically. |
| Sent to printer | Data delivery finished without a detected error. | Check the physical ticket. |
| Error / Unconfirmed | A permanent failure occurred or the result is uncertain; part of the ticket may have been sent. | Check the printer and paper before creating another job. There is no automatic reprint. |
| Removed by older app | An older version removed the ticket without confirming transport delivery. | Check the paper and update the app to enable detailed status tracking. |
Test power-off and reconnection
Requires Android 20.33 or later with the web service enabled. Recovery covers network, Bluetooth and USB connection failures before any data is written.
- 01
Turn off the printer and send a new test
Keep the terminal switched on and connected to the Internet. Send the ticket once from its details page.
- 02
Check Waiting for printer
After the connection fails, the ticket keeps its reference and remains pending. It becomes eligible for retry after thirty seconds; the app checks the queue periodically.
- 03
Turn on or reconnect the printer
When the connection works again, the app attempts to send the same job. Do not select the test button again. With USB, you may need to accept the Android permission prompt.
- 04
Check the history and ticket
Check that the status changes to Sent to printer and that the paper comes out. If a partial delivery was possible, the job stays unconfirmed and is not repeated automatically.
What is kept and for how long
History and pending tickets expire after seven days by default. The server removes them automatically; the service configuration can set a different retention period.
While waiting for reconnection, the ticket keeps its content and original expiry date. Once finished, the content is removed and only history remains until expiry.
A ticket that already ended as Error or Unconfirmed does not return to the queue when the printer is switched on. Check the paper first and send a new test if needed.